
First choose your pattern. I really like this pattern and I transferred it to an old box. It's the Onesize pattern.

Make sure that the stretch of your fabric goes across the hips of the diaper. Cut out the fabric (an inner and outer fabric). I like using the rotary cutter because it is easier than marking the pattern and cutting with scissors.

Now add snaps. I add an extra piece of my fabric on the back to help reinforce the snaps.

The front side.

Or sew some loop velcro to the outside(this diaper still needs the rise snaps though). Rounded edges look and feel nicer in my opinion.

This is the diaper I'm sewing together. I've had it ready to sew together for a few months. I only had enough material to have half of the fabric so I cut out what I could from the fabric. I then cut another piece so I could have a whole diaper and sewed together the 2 pieces.

Since the outside is flannel I added a hidden layer of fleece to help with absorbency.
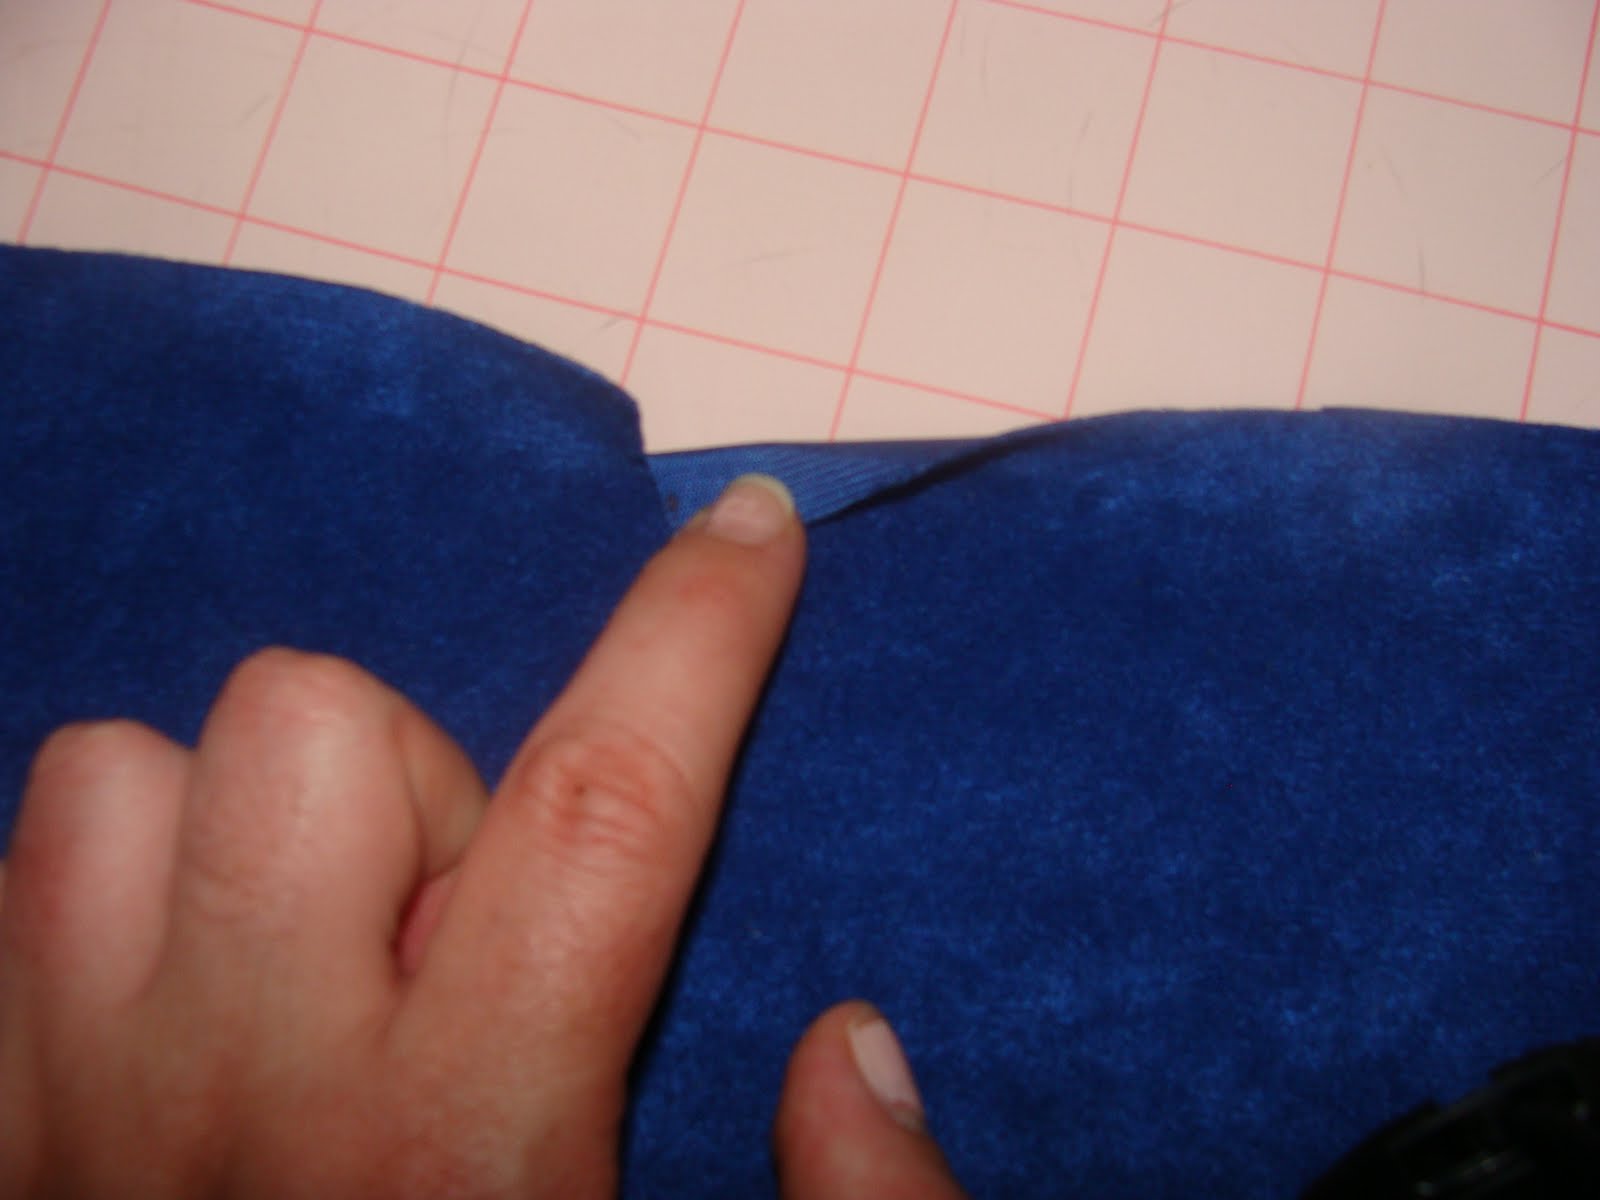
I cut in the seam allowance at the back elastic markings to make my pocket.

Then measure your elastic by stretching it between the 2 cuts and cut just a little more elastic off. Just in case you measured wrong and have a little allowance.

I use a 3 step zig-zag sitch set to 1.5 width and tack it down just on the ends. This means you sew and back-stitch over the elastic only on the end. I like to make sure to sew and back-stitch at least 4 times. Sew it on the wrong side of the material.

This is what it looks like tacked down.

Fold over the material wrong sides together and sew a channel along the edge of the top material. Make sure you don't catch the elastic as you sew otherwise your elastic won't stretch like it should.

The right side looks like this when you are done.

Do the same thing to your outer material.

Line up the material so that the seams of the elastic match up. Put a few pins in it to hold the material in place. Then sew from the edge of one of the openings to the other end. I try to keep the presser foot as my guide along the edge of the fabric.

What it looks like when sewn together.

Now measure your elastic for the legs and front and tack it down on the ends. It will look like this when it is done.

Trim around the edges for nicer turning.

Turn it right side out and try to get the corners looking nice.

Here it is fully turned.

I start at the edge of the elastic pocket to top stitch.

First I reinforce the elastic one more time before top stitching. Then I turn the diaper and top stitch.

Feel for the beginning of your elastic and move the diaper so that you don't catch the elastic with your stitching. I feel for the elastic before stretching and sewing a casing around the elastic. When you get to the end of the elastic, move the diaper back over so you are back to sewing close to the edge.

Your diaper is top stitched. Now you are almost finished.

Using your awl make holes where the pattern shows to put the snaps. Or you can sew the velcro on right now. Sew the hook closest to the edge of the wings and then sew a piece of loop about 1/2 inch away to use as laundry tabs.

My lovely snap pliers.


Don't the snaps look lovely? Now make sure all the snaps work and don't come off.

Stuff your diaper. I use either a trifolded prefold or microfiber auto towel to stuff.

And there is your completed pocket fitted diaper.


7 comments:
Awesome tutorial! I have two boys (4 & 3) with another on the way in October and have decided to give cding a try this time around. I was thinking I would have to spend $400+ on cd's to start out but am ecstatic that I can actually make them! I have yet to actually MAKE one but have been researching and gathering info for the past few days and your tutorial answered A LOT of my questions, so THANK YOU. I will check back often to see your work, and possibly to ask a question or two :)
-Bri Streeter
Hi! I have one more question. I noticed the pattern says "onesize"-- at what size/weight would you say your baby could begin wearing this diaper? Or I guess the question would be, in your experience when have your kids fit this diaper well? Thanks so much! I see that you are due with another baby any day now so Good Luck! I hope all goes well for you. PS- found out I'm having a GIRL today! So excited to make cute little girly diapers :)
-Bri Streeter
Congratulations on the girl!
One size usually means it can start fitting between 8 and 10lbs for most diapers. I'm not exactly sure what weight I can start putting Baby Sister in them. She comes in less than a week so I'll be able to check on it soon. This pattern does snap down small and some of the newer patterns this same lady made (the sprout snap pattern) has the option to snap the rise snaps in the actual waist snaps to size it down even more. I'll have to try it out.
Right now both my kiddos are in the same size diaper even though there is a 10lb difference their body shape is different (long and skinny vs shorter chubbier thighs with a belly). I don't have the rise all the way unsnapped even for my almost 3 yr old unless he is wearing it overnight.
thank you for the tutorial!
This is an awesome tutorial. Thank you! I just whipped up my first of many, many diapers :)
I'm having trouble with the link for the pattern...am I doing something wrong?
No you aren't doing anything wrong. The site the pattern is from no longer is up and running, I am looking for a copy of the pattern and if I find it I will post here :D
Post a Comment